
Recap
The SharePoint Out Of the Box List View Web Part is quite powerful, yet it isn’t able to display the attachments of a List Item. It can show if an item has any attachments (with a nice paper-clip icon) but you won’t be able to download these attachments directly.
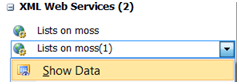
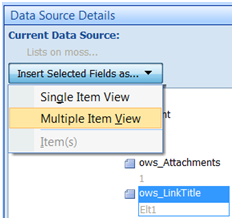
I presented in Part 1 of this walkthrough how to create a DataView part consuming the Lists.asmx Web Service in SharePoint Designer to display the elements of a list. We are now going to display the attachments of these list elements.
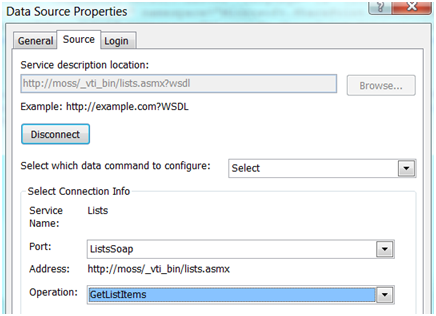
To retrieve the attachments URLs we need to add an option to the Web Service Soap query, the “IncludeAttachmentUrls” option (details of the query options is available at http://msdn.microsoft.com/en-us/library/microsoft.sharepoint.spquery_properties.aspx). We could just open the datasource and change the QueryOptions parameter, that is if the SharePoint WSDL files were correctly defined… As it is not the case and SharePoint Designer itself isn’t perfect, you won’t be able to do that (see http://blogs.msdn.com/sharepointdesigner/archive/2008/06/20/data-source-issues-and-workarounds.aspx for reference).
But there is a workaround!
4 – Modify the DataSource QueryOptions parameters
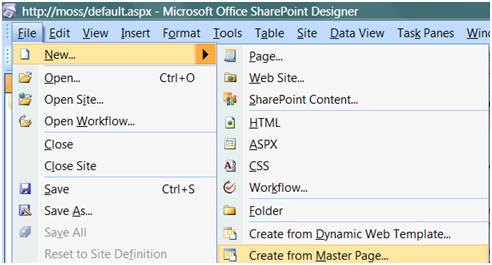
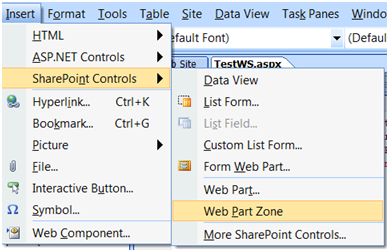
![]() First you need to have access to the page source, so let’s switch SharePoint Designer to Split or Code view :
First you need to have access to the page source, so let’s switch SharePoint Designer to Split or Code view :
In the code, search for the line starting with: “SharePoint:SoapDataSource”. On the same line you shall see something like “ </listName></GetListItems></soap:Body>”.
![]()
As you can see the parameters we defined in the Data Source Gui are found here and guess what, we can modify these parameters from here! So let’s add the parameter requesting the attachments url :
<queryOptions><QueryOptions><IncludeAttachmentUrls>TRUE</IncludeAttachmentUrls></QueryOptions></queryOptions>
So that the end of the soap request body looks like :
</listName><queryOptions><QueryOptions><IncludeAttachmentUrls>TRUE</IncludeAttachmentUrls></QueryOptions></queryOptions></GetListItems></soap:Body>
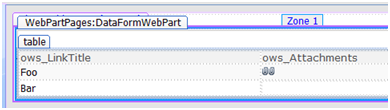
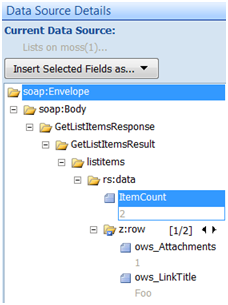
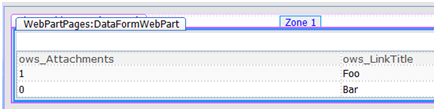
Save the page and check the result in the design view :

The ows_attachments field now contains the attachments URLs or 0 for list items with no attachments using the following format :
;#http://moss/Lists/MyList/Attachments/1/Piece.txt;#http://moss/Lists/MyList/Attachments/1/Piece2.txt;#
We still need to make some nice links out of this field. Time to put on your XSL designer gear.
5 – Modify the XSL Presentation
We first create a XSL template to transform the string given by the Web Service into a nice series of picture. You might use my sample below, paste this piece of code in the XSL part of the aspx page you are editing in SharePoint Designer (maybe just before the node “</xsl:stylesheet>”).
<xsl:template name="SplitAttachments">
<xsl:param name="str"/>
<xsl:choose>
<xsl:when test="contains($str,';#')">
<xsl:variable name="attachmentUrl" select="substring-before($str,';#')"/>
<xsl:if test="string-length($attachmentUrl) != 0">
<a href="{$attachmentUrl}"><img style="border:0px" src="/_layouts/images/attach.gif" alt='Open'/></a>
</xsl:if>
<xsl:call-template name="SplitAttachments">
<xsl:with-param name="str" select="substring-after($str,';#')" />
</xsl:call-template>
</xsl:when>
<xsl:otherwise>
</xsl:otherwise>
</xsl:choose>
</xsl:template>
This XSL template uses a recursive template to parse the attachments and generate corresponding links and pictures.
Now replace
<xsl:value-of select="@ows_Attachments"/>
By
<xsl:call-template name="SplitAttachments">
<xsl:with-param name="str" select="@ows_Attachments" />
</xsl:call-template>
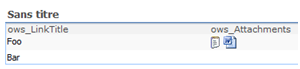
And you should see this :
The paper clip icon you see are actually pointing to the attachments.
6 – Pimp up my Data View
At this point our Data View Web Part works ok but isn't as nice as you might want it to be.
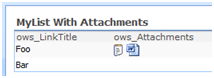
As an example you might want to change these paper clips icons with icons representing the file type. The good news is that the XSL extension provided by WSS (default prefix used by SharePoint Designer is DDWRT) can handle this through a MapToIcon template. If you give a file extension to this template, it will return the icon filename corresponding to this filetype.
Using the substring-after method to get the filetype we can imagine replacing :
/_layouts/images/attach.gif
By
/_layouts/images/{ddwrt:MapToIcon('',substring-after($attachmentUrl,'.'))}
 Now save the file and check the result :
It still isn't perfect but from this point on things will be much easier to improve if you know your HTML and a bit of XSL.
7 – Conclusion
That’s it, you have got a functional Web Part to display your List.
Using this method you can specify every parameters of the GetListItems method, as an example the ViewName parameter can prove usefull to filter items. If you need to test your parameter I would suggest you to try soapui.org.
You can of course export this web part to put it another page, even on another page of another SharePoint farm (in this case, you will have to use the basic authentication mode unless kerberos authentication can do the trick). If you want to display another list you can just export the WebPart and edit the file before reimporting it. This might prove very useful to put this web part on a publication page as these pages can’t be edited using SharePoint Designer.
If you need more details you can contact me by leaving a comment or using the "IM Me" box on the right of this page.


